
This page contains Bob's notes for putting a different battery in the idprom chip on an Ultra 1, Ultra 2 and other Sbus Sun machines.
The idprom chip on a Sun Ultra 1, Ultra 2, E450, and several other machine types. contain a 3v battery. After some period of time, the battery fails and when you power on the machine, it shows the message "IDPROM Contents Invalid". You see the MAC address as ff:ff:ff:ff:ff:ff the the machine will not boot. The following description was done on an Ultra 1 although once you get the orientation orientation of the chip correct, it would apply to other similar machines.
The IDProm chip on an Ultra 1 is near the back of the machine. It is partly hidden by the video board. The chip sits in a carrier which keeps the pins lined up when it plugs into the main board. The carrier is keyed to the mother board. Unfortunately, the chip can sit in the carrier either way. The chip has a yellow label with a bar code and the CPU ID on it. When viewed from the back of the machine, the CPU ID is oriented to be readable. When viewed from this orientation, the battery we are going to dig out is on the right end of the chip.
You will want to save the yellow sticker on the chip. It has the CPUID for this IDPROM. The Mac Address can be derived from the CPUID. In this case the CPUID was 8092ffce and the MAC address is 8 0 20 92 ff ce. Older Sun machines had Mac Addresses starting with 8 0 20. This identifies the manufacturer. The last three bytes identify the machine. The 8 and 0 are the first two digits of the CPUID. Skip the 20 and the remaining 3 bytes are the last three bytes of the Mac Address.
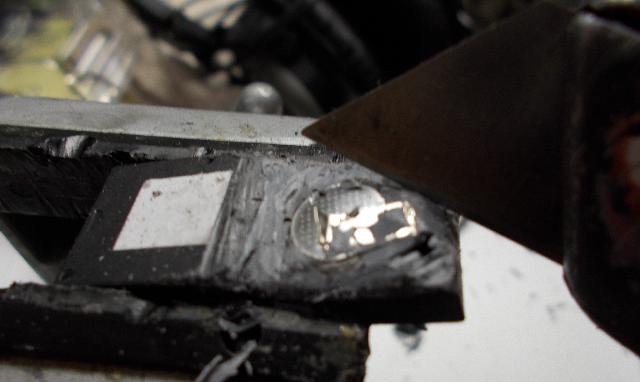
In this picture, you can see the battery exposed. I exposed the battery on the chip by placing it in a small vice with plastic jaws and carved on it with a Stanley Knife. You could do the whole job with a dremel, but that makes such a big mess that I chose to do the initial work with the knife. On the chips I have worked on there is a white serial number printed on the chip cross ways on the chip. This was the end that contained the battery.

Once most of the battery was exposed, I went in with a dremel using a small steel bit and dug in the end to expose the connections where the battery went into the other part of the chip. I used the dremel to cut off the connections near the battery so I would not rip them out when I dislodged the battery.
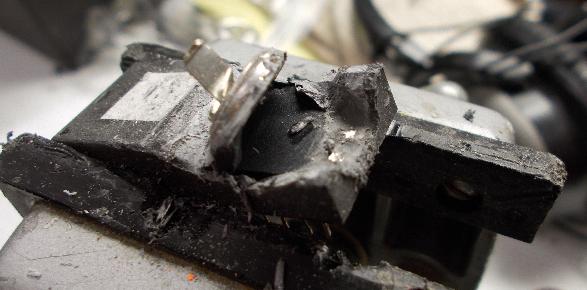
This picture shows the connections exposed and the battery pried part way out.
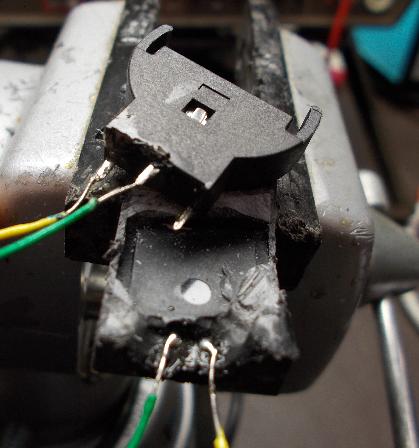
I soldered two wires onto the connections to the chip and also onto a CR2032 battery holder. Note that if you hold the chip with the battery connections at the top, the "+" is on the left and the '-' is on the right. I used a longer wire than is needed. The fellow who made the You Tube video actually glued the battery holder to the chip. This is definitely a neater job, but you have to make sure you do not foul the video card.

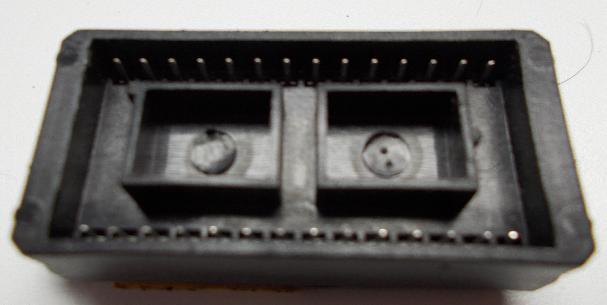
Here we see the chip back in place. Note that the carrier is keyed to the mother board. Looking at the bottom of the carrier we see two keys. Notice the protrusion in the right hand square at the center right and the protrusion at the top left on the left square. The center protrusion will be closer to the video card on the Ultra 1 and the battery was on the side by the other square.

This picture shows the system back up with the new battery in place. When you initially fire up the machine, you will still get the IDProm Contents Invalid message. You will need set the MAC Address and CPUID. It is possible that the machine is sufficiently confused that it will not initialize the video card. In this case you will want to use a null modem (serial) cable to connect the "A" serial port to a machine running Hyperterminal (Windows) or minicom (Linux) or tip (Solaris). This way you can see the diagnostics progress. If the keyboard is not recognized at this point, you can also use this window as the OK prompt.
Using the example machine as the sample:
At the OK prompt:
ok 0 0 mkp
ok 8 0 20 92 ff ce 8092ffce mkpl
^d^r (That's ctrl-d followed by ctrl-r)
Note that after you type the mkpl and hit enter, nothing seems to happen. You have to press the sequence ctrl-d and ctrl-r to complete
the command and get the OK prompt back. I suggest running "setenv auto-boot? false" and then running reset to make sure the
machine shows up with the mac address set.